
Farmhouse Floor Plans with Wrap Around Porch: Pick Your Lot
The usual advice is to choose the farmhouse you love, then make the wraparound porch as generous as the budget allows. That's backward. A larger porch can crowd the driveway, darken the living room, complicate the roof and leave you paying for covered space nobody uses.
When comparing farmhouse floor plans with wrap around porch designs, treat the porch as site infrastructure, not decorative trim. Start with the buildable lot, then size the outdoor rooms around furniture, shade, drainage and safe access. A shorter wrap that works every day is a better choice than a complete perimeter that only looks convincing in a rendering.
Define Site and Program Needs Before You Compare Plans
Mark the buildable area on paper
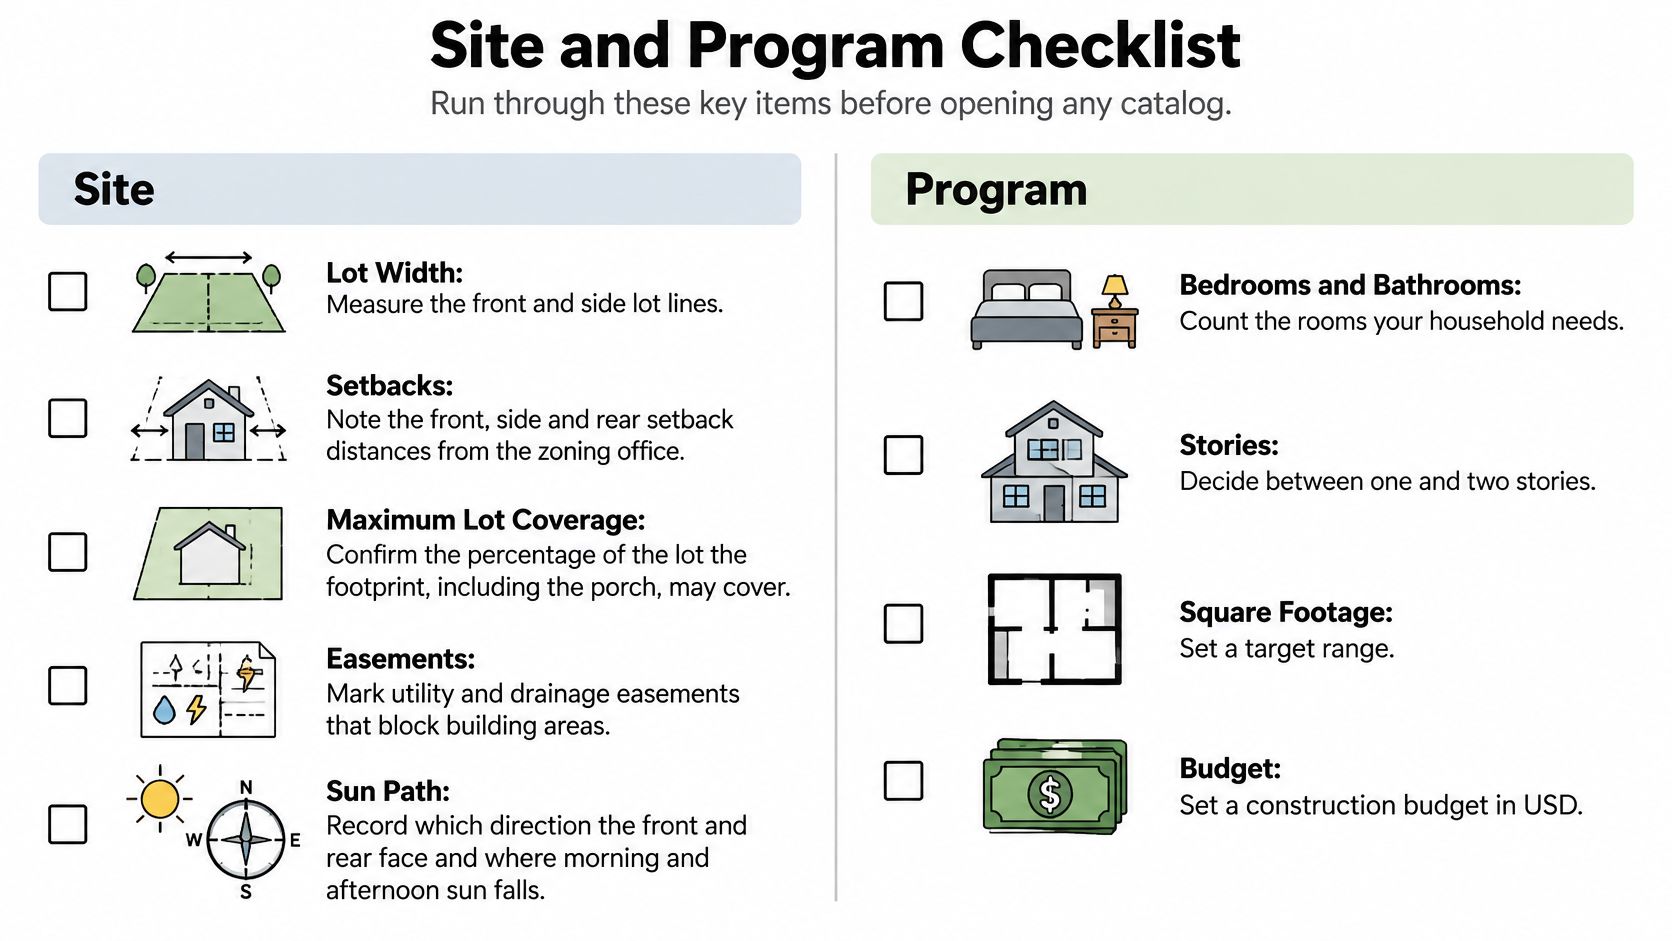
Print the lot survey and use tracing paper to draw the area where construction is allowed. Don't assume the property's advertised width is the width available for the house and porch.
Lot dimensions and setbacks. Record the width along the front and side boundaries, then obtain front, side and rear setbacks from zoning. Ask how porch roofs, posts, steps and projections are measured. A side return can eliminate space needed for parking or vehicle access.
Coverage and easements. Confirm which porch components count toward maximum lot coverage. Mark utility and drainage easements before drawing the footprint; an apparently empty strip may not be buildable.
Exposure and drainage. Add a north arrow, morning and afternoon sun, prevailing breezes, grade changes and the intended stormwater discharge location. Also collect the flood designation and wind criteria.
Infill constraints. Ask about fire separation near property lines and restrictions on openings or projections. Keep an accessible approach route available rather than filling the remaining side yard with porch structure.
Use this guide to lot size requirements for different house plans to organize the questions, then confirm the answers with the local departments that approve your site.
Write down what the household will actually do
List bedrooms, bathrooms, preferred stories, target heated area and construction budget separately from the porch program. For the porch, name activities: morning coffee, family meals, children's play, reading or unloading groceries.
Count the furniture you intend to own, including folding chairs and cushion storage. Identify anyone who needs step-free entry or additional door and turning clearance. Put a grill location on the site sketch, but check its operating instructions before assuming it belongs beneath the porch roof.
Keep a recognizable arrival porch toward the street or main approach, even if daily living happens along the side. In its buyer-preference survey, NAHB reported that 81% of prospective buyers rated front porches as desirable, as reported by Builder.
Turn the household requirements into catalog filters for bedrooms, bathrooms, stories and square footage. Retain a small shortlist that fits the buildable envelope, not just the room wish list.
Pick the Porch Configuration Your Lot Can Support
A porch that wraps every side is often the most expensive and least used version of the idea. Unnecessary runs add decking, roofing, posts and cleaning without creating another useful outdoor room.
Porch configurations matched to lot and climate
Configuration | Best lot or site | Main trade-off | Cost and maintenance |
|---|---|---|---|
Full perimeter wrap | Large open lot with setbacks to spare | Most deck, roof and post length to pay for and drain | High |
L-shaped wrap (front and one side) | Corner lot or home with a side yard | Covers primary and secondary facades with shorter side runs | Medium to high |
Front-plus-side return | Narrow or infill lot where the side setback is tight | Side projection must be checked against setback rules | Medium |
Front porch with partial side wrap | Lot where projections are limited | Less shade and fewer outdoor zones on the rear | Medium |
Screened or partly enclosed wrap | Humid, insect-heavy or hot climate | Reduces daylight and airflow; screens need regular upkeep | High |
Open shade-first wrap with deep eaves | Hot, sunny site with a useful prevailing breeze | Requires deeper overhangs and shading planning | Medium |
These are relative comparisons for similar construction quality, not bids. A modest screened porch with complicated roof connections can cost more than a longer open porch with straightforward framing.
Give each run a job
The strongest arrangement usually combines a front arrival space with a side outdoor living room. The entry stays legible, visitors don't walk through the dining furniture, and household seating can face the quieter yard.
This isn't a departure from farmhouse precedent: the National Register survey of the Bosch farmhouse describes an L-shaped porch extending across the main south facade and halfway along the east facade.
A front-plus-side return works when the corner provides useful shelter or connects to a side entrance. It doesn't work when the return ends at a blank wall and becomes a narrow dead end. Shorten that run and spend the saved construction effort on the sitting area.
Screening is most useful where insects prevent normal evening use. Screen the occupied zone rather than automatically enclosing the arrival porch. Doors, screen frames and furniture can otherwise turn the main entrance into an obstacle course.
Give every stretch of porch a purpose. If you can't name the activity or connection it serves, test a version without it.
Compare geometry before choosing architecture
Select a pair of configurations that suit the surveyed lot. Trace each around the same approximate house footprint, keeping the driveway, outdoor equipment and neighboring windows visible.
Compare where people arrive, where they sit and what they face. A corner lot may offer a generous side yard but little privacy; a shorter porch with a sheltered seating corner may be more comfortable than an exposed L-shaped wrap.
Only then compare stock plans. You'll be evaluating layouts that can support your site strategy instead of trying to rescue a favorite elevation.
Set Porch Depth and Layout Around Real Furniture
Porch depth, furniture fit and daylight effect
The following are hypothetical layout tests, not guaranteed furniture capacities or code clearances. Use the actual dimensions of your furniture; daylight also changes with roof height, orientation and window placement.
Porch depth | What fits | Best use | Daylight effect |
|---|---|---|---|
6 ft in a sample layout | Walkway plus one or two compact rockers | Passing through, morning coffee | Relatively limited shade compared with deeper versions |
8 ft in a sample layout | Two chairs, a side table and a clear walking lane | Daily sitting | Moderate shade on first-floor windows |
10 ft in a sample layout | Table for four with chairs pulled out, subject to furniture dimensions | Dining and evening use | Noticeable shade; higher glazing may help |
12 ft in a sample layout | Table for six plus a compact sideboard, subject to circulation checks | Entertaining and long gatherings | Significant shade; plan window placement early |
Measure usable depth, not the roof outline
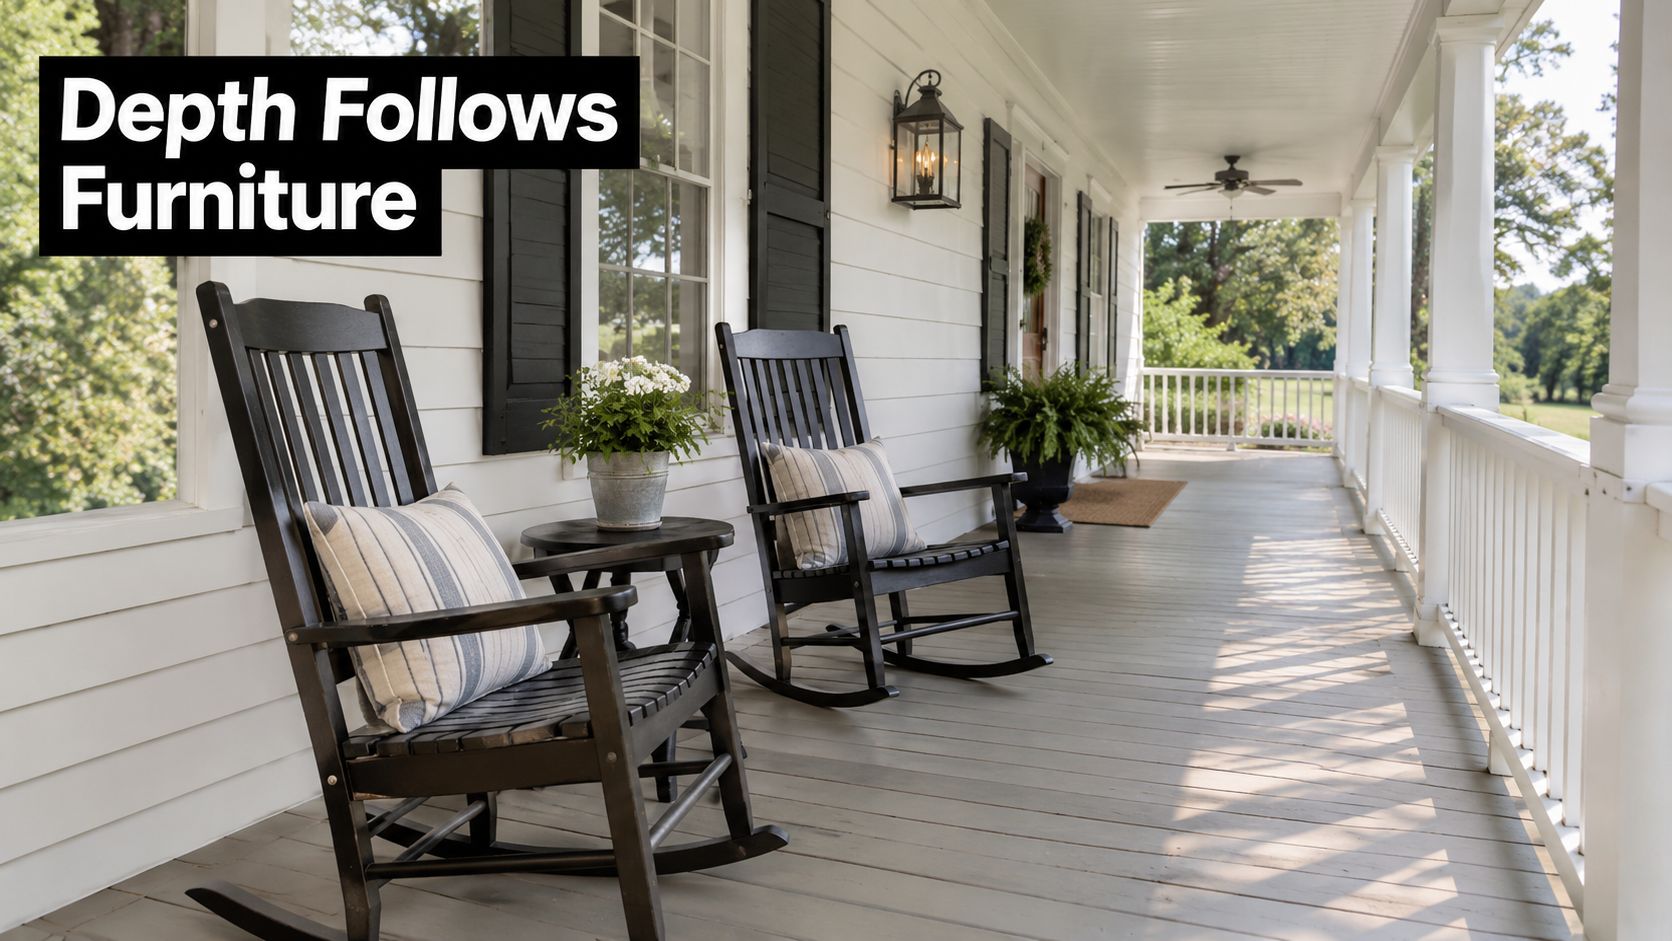
Start with a continuous walking lane, then add occupied seating space and tables. Measure between the house wall and the inside face of posts or guards, not to the outside edge of the roof. Structural columns can consume the space that looked available on a catalog plan.
Rockers need room to move behind them. Dining chairs need space when occupied and pulled away from the table. Place the main porch door where its swing won't pin a chair against a window, and test whether people can pass while someone gets up from the table.
Equip the occupied zones
A deep roof doesn't necessarily stop low afternoon sun. Put operable shutters or exterior shades on the exposed edge, with controls reachable without moving the furniture. Use screens where insect protection matters, but preserve openings for ventilation.
Fans and heaters. Center fans over seating rather than empty circulation. Select equipment listed for the exposure and coordinate heater clearances with ceilings, screens and furnishings.
Lighting and outlets. Light the door, steps and occupied areas separately. Put weather-protected receptacles near seating and maintenance locations so extension cords don't cross the walking lane.
Storage. Reserve a dry cabinet or adjacent interior closet for cushions and covers. Keep grill storage separate from the approved operating location.
In a hypothetical 12-foot-deep layout, missing shade controls, outlets and drainage can still leave you with expensive circulation space. Depth alone doesn't make the porch comfortable.
Use the covered porch and deck design guide when evaluating the connection to indoor rooms. Then draw furniture to scale with an architect's scale or in SketchUp, mark door swings, and tape the layout on a driveway or garage floor. Walk the turning paths before accepting the depth.
Build the Porch Frame, Roof Tie-Ins and Guardrails
Coordinate the structure in a fixed order
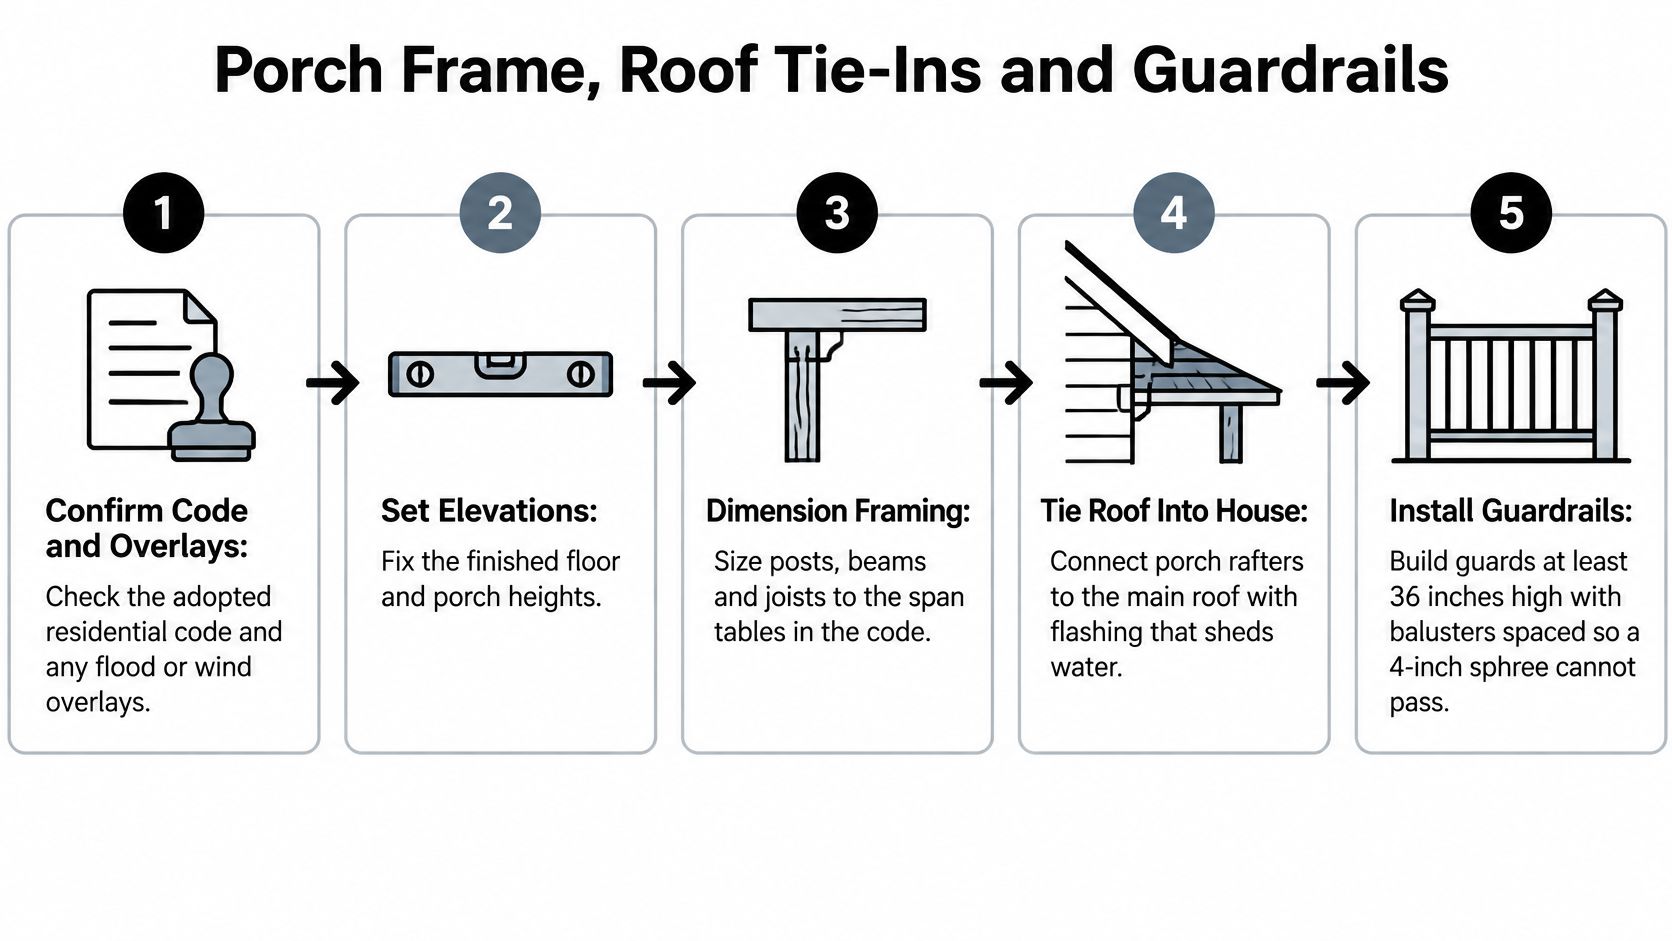
Confirm the jurisdiction's adopted residential code and overlays. Obtain the applicable flood and wind requirements before selecting structural details. Copying a porch detail from another project can introduce requirements that don't match your site.
Set the finished-floor and porch elevations. Establish their relationship to the entry threshold and surrounding grade. Leaving heights unresolved can produce awkward steps, trapped drainage or an inaccessible entrance.
Dimension circulation and stair geometry. Show the route between doors, seating, stairs and the yard. Don't treat a stair opening as leftover space between columns; it needs coordinated landings, supports and handrail locations.
Engineer a connected load path. Coordinate the roof, columns, beams, ledger where used, and footings. Reserve posts and foundations before fixing window positions, or the structural layout may force late changes to the facade.
Verify guards, handrails, drainage and permit details. Check the complete drawing set before finalizing elevations. A decorative railing drawn without attachment details isn't a buildable guard system.
Use code benchmarks as coordination points
Under IRC-based requirements, guards are generally required where a walking surface is more than 30 inches above adjacent grade, porch guards are typically at least 36 inches high, and stairs with four or more risers require a handrail 34–38 inches above the stair nosing, as summarized in Boulder County's residential stairways, handrails, ramps and guards guide.
Code benchmarks for porch guards and handrails
Element | Trigger | Typical threshold |
|---|---|---|
Porch guard | Raised walking surface reaches the guard trigger described above | Required guard height under the adopted code |
Stair handrail | Stair reaches the riser trigger described above | Required height measured above stair nosings |
The distinction matters: a guard protects an open edge, while a handrail provides a graspable support along stairs. A broad decorative cap may serve the first purpose without satisfying the second.
For homeowners comparing railing assemblies, XTREME EDEALS INC.’s railing code guidance for DIY deck builders is a useful supplementary resource. Use the building department's adopted requirements to approve the actual assembly, including openings, attachment and graspability.
Resolve roof intersections and water paths
Show where the porch roof meets the house wall or main roof. A continuous roof around a corner may create hips, valleys or concentrated runoff that isn't obvious in the elevation. Check roof pitch, headroom and the space available beneath upper windows before extending it.
Flashing must direct water onto the next drainage surface, not behind siding. Detail wall intersections, ledger connections and kick-out flashing where appropriate; caulk isn't a substitute for properly layered flashing.
Construction checkpoint: Mark posts, valleys and downspouts on the same drawing as doors and windows before approving the exterior.
Slope porch walking surfaces away from the house using details appropriate to the decking system. Route gutters and downspouts to the site discharge system, away from stair landings and accessible approaches. Local amendments can change every code threshold, so obtain confirmation rather than treating a general guide as permit approval.
Match Orientation, Climate and Foundations to the Site
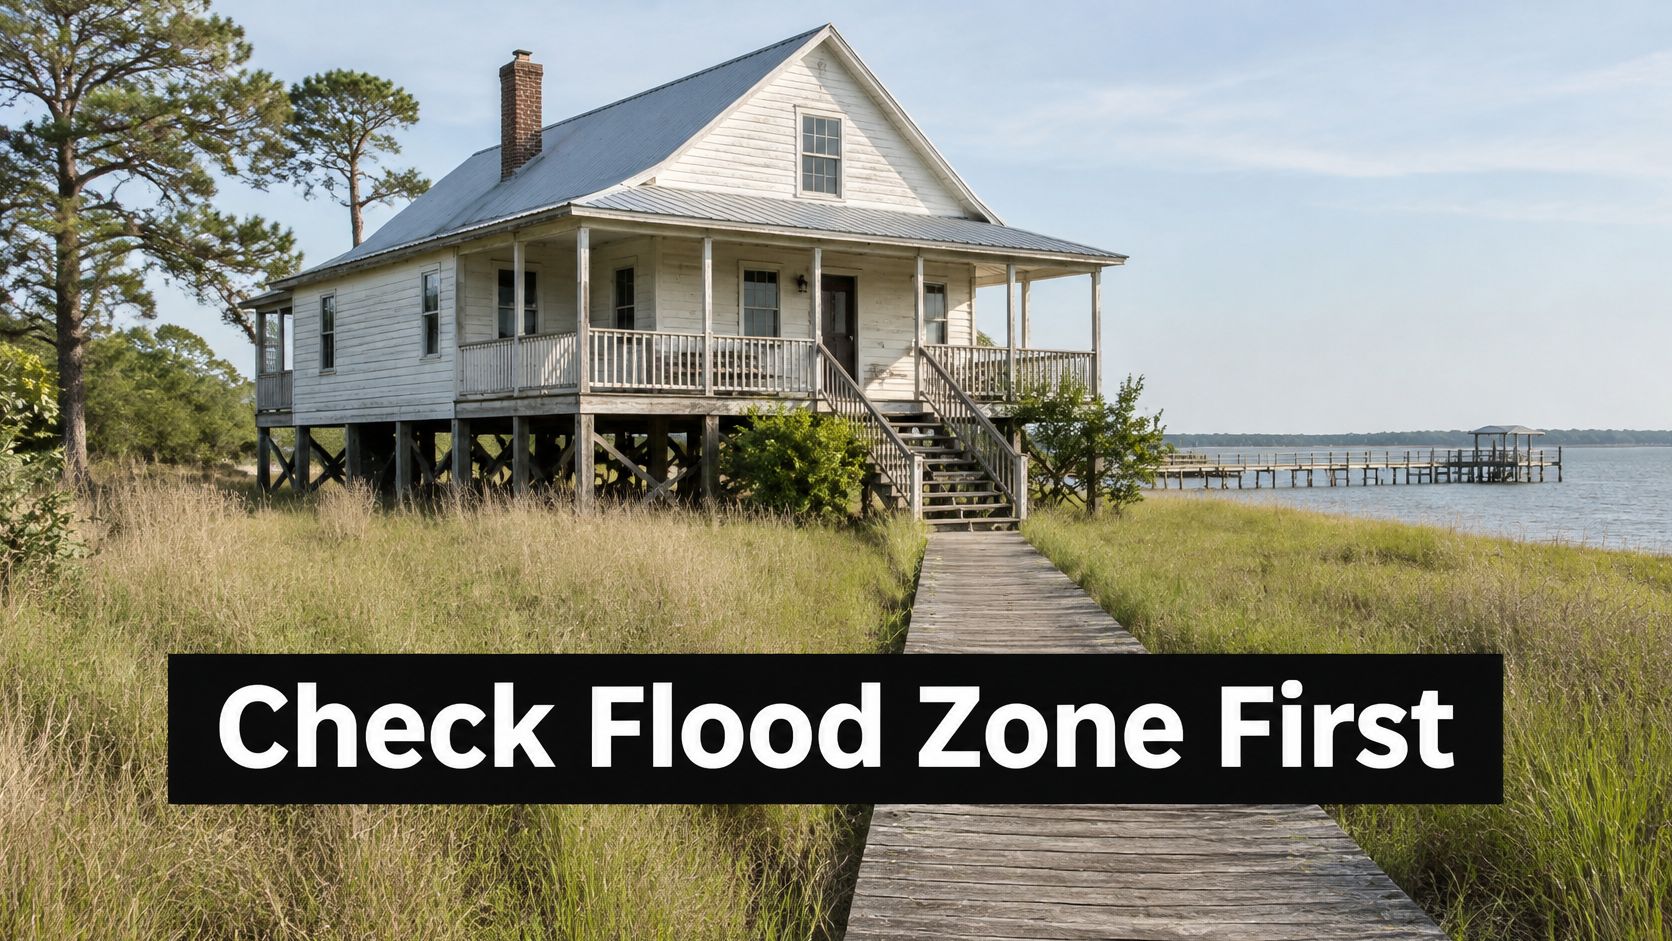
Flood and coastal conditions can change the porch concept before materials are selected. Resolve them in this sequence:
Obtain the flood zone, design flood elevation, expected erosion or scour conditions and wind criteria.
Decide whether the porch is attached to the house or independently supported.
Select foundations capable of resisting vertical, lateral, uplift, flood and debris forces.
Detail positive connections from the porch roof through columns and beams to the foundation.
Check that stairs, ramps, utilities and any enclosure won't obstruct required flood flow.
FEMA's flood-resistant design guidance includes attached and detached porches, recommends open foundations for coastal conditions that require passage of floodwater and waves, and calls for adjacent porch foundations to use criteria equivalent to the primary foundation system.
Don't attach a broad roof or shallow porch footing to a sturdier house foundation without checking differential movement and uplift. Independent support still requires an engineered interface; it doesn't mean the porch can move unpredictably against the house.
Match the assembly to the exposure
Orientation, foundation and materials by site exposure
Site exposure | Orientation and shade | Foundation approach | Materials to specify |
|---|---|---|---|
Hot, sunny inland | Shade west and south sides in northern-hemisphere settings; use deep eaves | Porch footings coordinated with slab or crawlspace house | Light-colored sealed or composite decking; light ceiling finishes |
Humid coastal, salt air | Catch breezes while limiting direct storm exposure | Piers or piles; open foundation where flood rules apply | Exposure-appropriate stainless fasteners, PVC or composite decking, compatible protective coatings |
Freeze-thaw northern | Favor useful winter sun; protect steps from icing | Footings to locally required frost depth | Freeze-resistant walking surfaces, drainage details and exterior-rated ceiling materials |
Mapped flood zone | Set porch elevation to applicable flood requirements | Engineered piers, piles or other approved foundations with positive connections | Flood-resistant materials below the design flood level |
Wildfire or smoke-prone | Maintain separation from brush and stored fuel | Site-appropriate foundation; noncombustible skirting where permitted | Approved ignition-resistant decking and ceilings |
A deep horizontal roof handles high sun better than low sun. On a hot site, west-facing seating may need vertical shading even when the roof is generous. Position occupied areas to catch useful breezes without placing them directly in the strongest storm exposure.
Specify the entire assembly, not just the visible boards. Coastal connectors must suit salt exposure, ceiling panels need suitable fastening, and enclosed cavities need moisture management. Composite decking can become uncomfortable under strong sun, so evaluate samples in the proposed exposure.
Coordinate surface runoff with the drainage and grading guide, particularly where the porch changes existing flow paths. Choose materials for the worst credible exposure on the site, not the typical pleasant afternoon.
Budget, Permits and Modifying a Stock Plan
Price the porch as a separate scope
A wraparound porch behaves like site infrastructure, so price it that way. Total perimeter controls roof edge, structure, and gutter runs. Usable depth controls spans, floor area, and footing loads. A price tied only to heated square footage hides both drivers.
Rank early cost drivers in this order, then let soil, slope, and exposure reorder them:
Perimeter and depth. Measure the full run, including returns and occupied corners.
Roof complexity. Count hips, valleys, intersecting returns, and wall tie-ins.
Foundation system. Separate conventional footings from piles, rock excavation, or engineered supports.
Decking and drainage. Include substrate prep, edge flashing, slope, and finish maintenance.
Guards and railings. Price full assemblies with posts, connections, and stairs.
Columns. Separate load-bearing posts from decorative wraps and bases.
Electrical runs. Include circuits, switching, fixtures, fans, and weather-rated boxes.
Ask builders for a porch-only lump sum plus a per-linear-foot figure at a stated depth and specification. The unit price works only when quotes cover identical work. Require each bidder to list exclusions in writing. Do not let them bury gaps inside an allowance. Keep a contingency for groundwater, unsuitable soil, or difficult digging. A cheaper deck board never offsets an unknown foundation condition.
Budget rule: Simplify the geometry before downgrading flashing, connections, and structural members.
Request a coordinated modification set
RBA Home Plans sells purchased farmhouse drawings and handles modification requests alongside locally commissioned custom design. To start a change, use the RBA Home Plans site to submit a modification request that describes the intended porch activity and the site constraint, not only the look you want. Dining for six, a swing bed, or a sheltered stair landing each imply a different depth, post spacing, and roof load.
Expect trade-offs. Added depth can change joist spans and darken adjacent rooms. A new side return alters the roof intersection and flashing. A shifted door can land on a beam or post. A different column profile still needs a check on what carries load and what is only cladding.
Ask for revised floor plans and elevations showing footings, roof tie-ins, column centers, and guard locations. Confirm which items need site-specific engineering for wind, snow, seismic, or flood rules. Then get pricing from the revised set, not from a marked-up rendering or a verbal description.
Confirm the review path
The porch is usually reviewed with the house. Zoning projections, floodplain work, guard heights, and structural details can trigger separate checks. Talk with building and zoning staff early. Approval from one desk does not grant approval from the other.
Questions multiply on raw land, where access, wells, septic, and setbacks shape what can be built. For an undeveloped parcel, Dollar Land Store's guide to planning your first rural home site can help organize permit questions before you call the counter. Keep application forms, utility letters, and site approvals in the schedule. Buying drawings is a step in the process. It is not permission to build.
Confirm the Plan Before You Order Drawings
Make the shortlist actionable
Use this week to turn attractive plans into candidates a builder can evaluate. Save the floor plan and elevations together, with the plan identifier visible, so everyone reviews the same version.
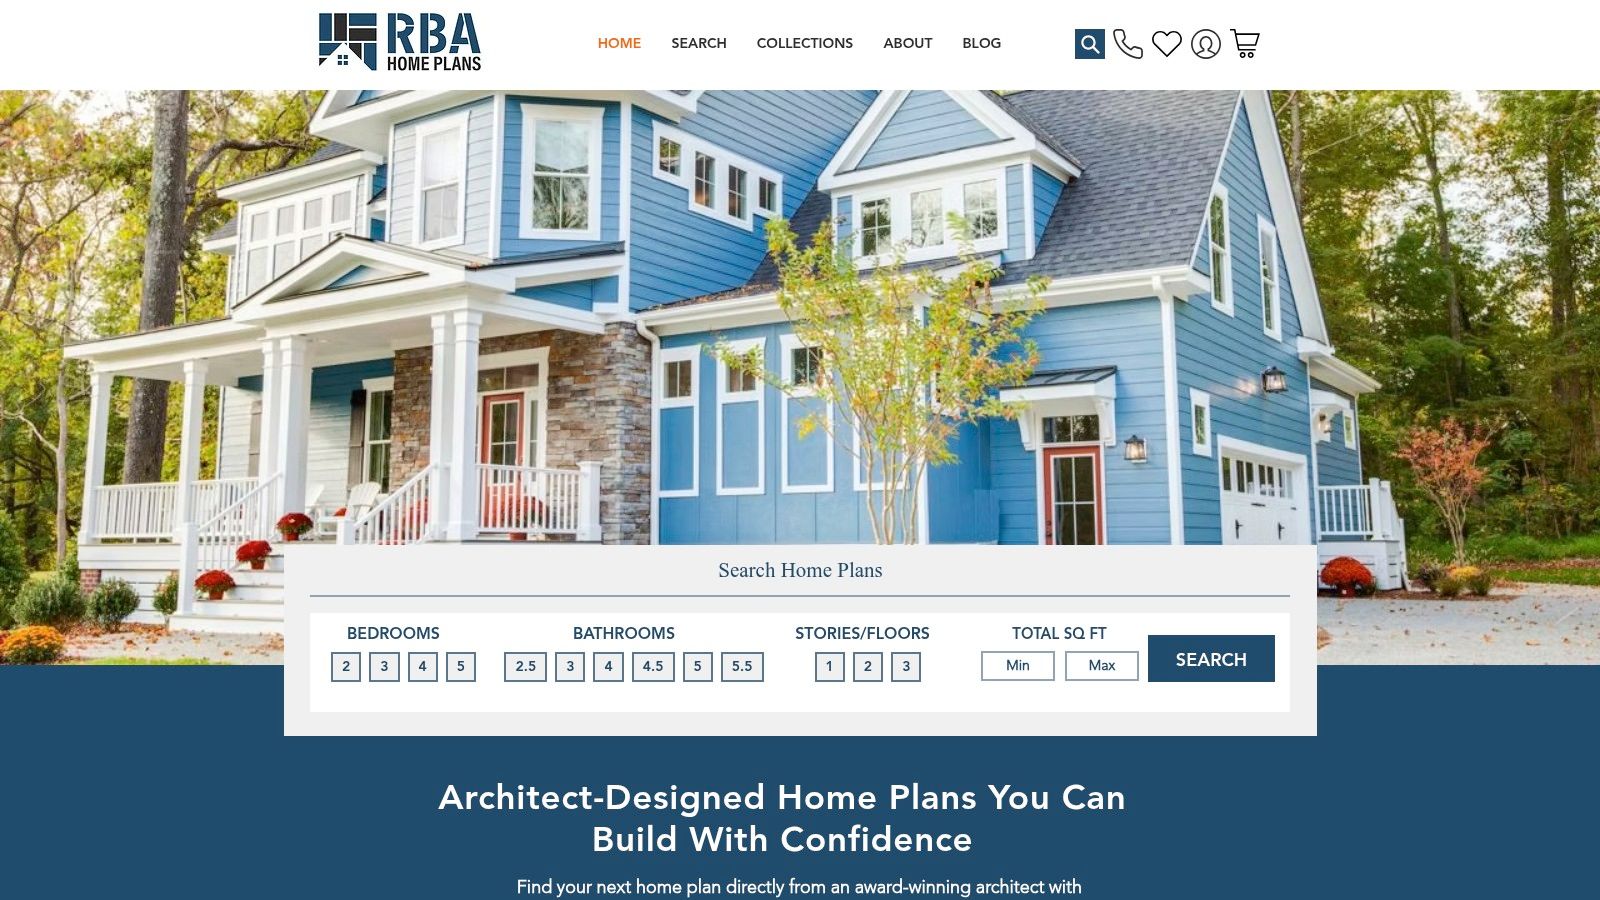
Filter and mark candidates. Shortlist plans by bedrooms, bathrooms, stories and square footage. Label each porch configuration against your lot type and reject options that require an unsupported zoning assumption.
Send the survey, flood and wind information, and setback notes to the builder or engineer. Request a porch detail sheet covering foundations, roof connections and guards, along with a list of unresolved site inputs.
Obtain local confirmation. Ask building staff about code amendments and zoning staff about projection rules. Keep their written responses with the project documents so a later reviewer can understand the basis of the design.
Request the necessary stock-plan modifications and review the revised elevations against the furniture layout. Check that the changes appear consistently in the floor plan, roof plan and foundation drawings.
Review movement before signing off
Read the plan as a sequence of daily trips, not a collection of rooms. Follow the route from parking to the entry, from the kitchen to outdoor dining, and from seating to the yard. Task Masters Inc.’s guide to check how your floor plan flows is useful for understanding symbols and testing those connections.
For developers, apply the lot-width test across the complete site plan rather than relying on a representative parcel. Corner conditions, utility placements and grade changes can require different porch variants even when the houses share an interior layout.
Assign every unresolved question to a named person before ordering the final set. A builder can price construction, an engineer can resolve structural requirements, and local officials determine approval conditions; none should have to guess what another party intended.
A wraparound porch is approved on the site plan and the drawings, not on the rendering.
RBA Home Plans offers searchable farmhouse designs with floor plans, elevations and purchase options, along with modification requests for layouts that need adjustment. Visit RBA Home Plans to compare candidates that suit your household, then bring your lot survey and porch requirements into the selection process.


Comments