
How to Prevent Mold Growth at Home the Right Way
You notice it first as an odor. The hall closet smells stale after rainy weather, the bathroom ceiling stays damp long after a shower, or a basement corner feels colder than the rest of the room. By the time dark spotting appears, the underlying problem usually isn't the spot itself. It's moisture that has lingered on a surface, inside a material, or behind a finish.
Learning how to prevent mold growth means managing water and humidity before cleaning becomes necessary. Daily habits matter, but so do the foundation, roof, wall assembly, drainage details, and HVAC choices selected before construction begins. A dry home is rarely the result of one product. It's the result of a chain of decisions that helps water leave and materials dry.
Why Mold Starts and What Really Stops It
A musty closet can send homeowners straight to the cleaning aisle. Cleaning removes a visible symptom, but mold returns when condensation, a leak, or trapped humidity keeps a surface damp. Mold prevention starts by controlling moisture and giving wet materials a dependable way to dry.
Moisture may sit behind a toilet, beneath a sink, around a window, under attic insulation, inside a wall cavity, or along a foundation wall. The room can feel comfortable while one concealed area remains wet. The EPA's guidance on mold and moisture in homes identifies moisture control as the central prevention strategy and recommends indoor relative humidity between 30% and 50%. Humidity above 60% is likely to cause condensation.
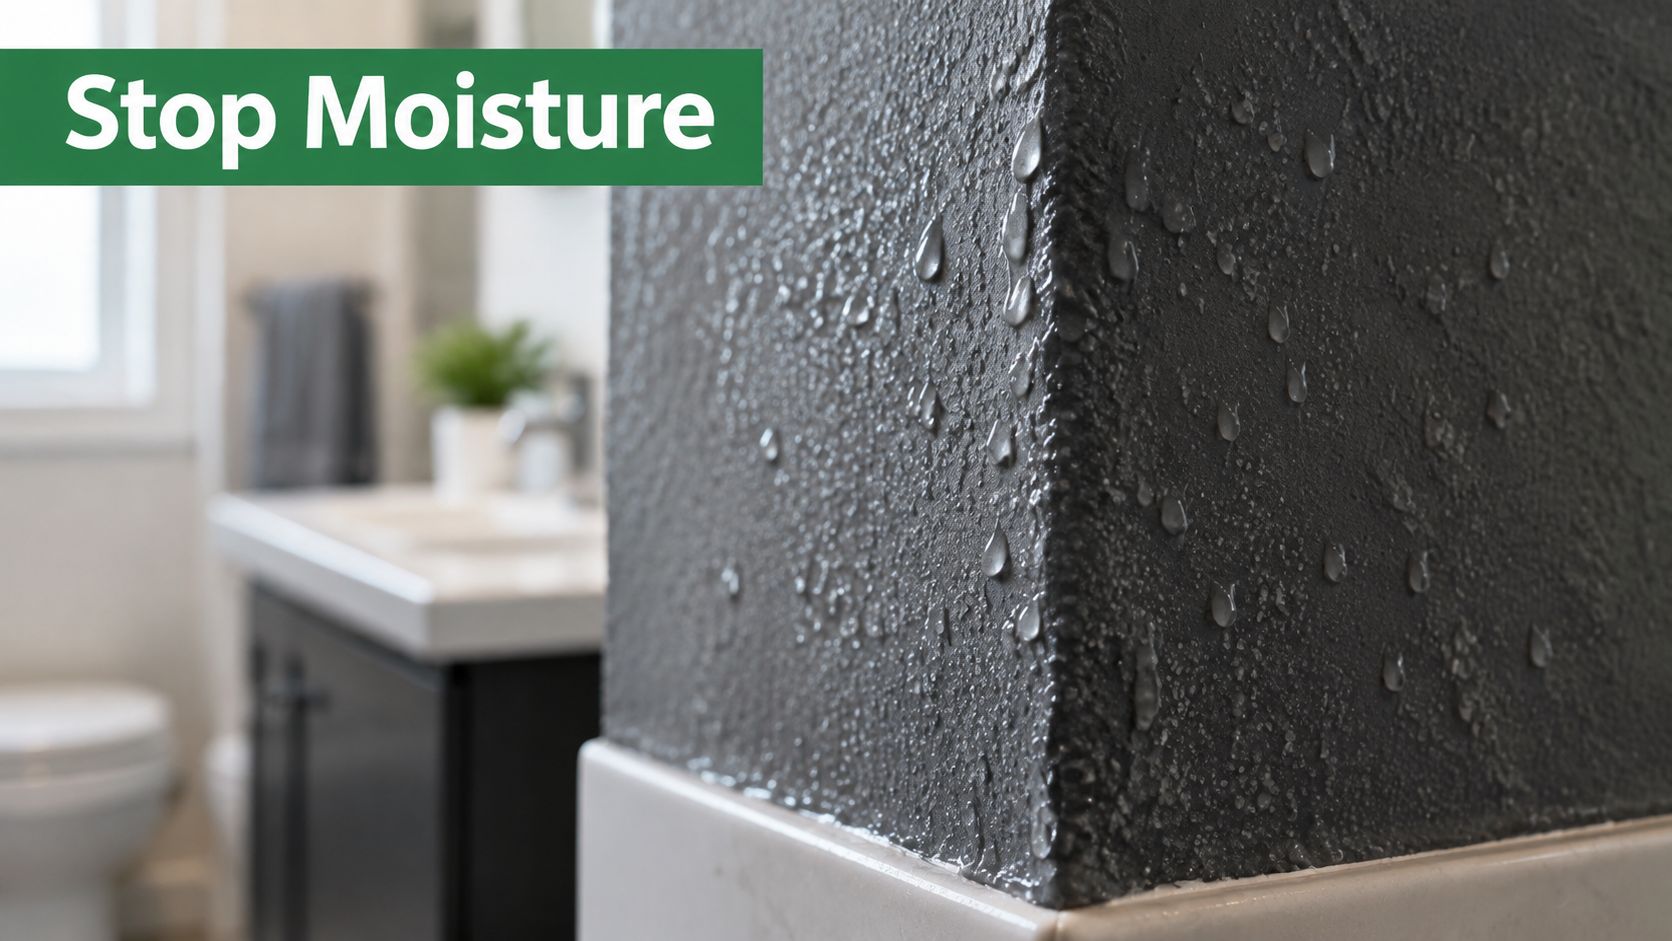
Visible growth is a late warning
A dark mark means the surface has already spent time under unfavorable conditions. Ask three practical questions:
Where did the water come from? Check leaks, rain entry, plumbing failures, and indoor steam.
Why did the area stay wet? Examine airflow, surface temperature, insulation, and ventilation.
How will you verify the repair? Use a hygrometer or moisture meter instead of relying only on smell or touch.
Design decisions determine how easily a home manages these risks. Foundation drainage and basement detailing affect ground moisture. Roof overhangs and flashing limit rain entry. Wall assemblies need a sensible drying path, and HVAC equipment must control indoor humidity without leaving cold surfaces prone to condensation.
For buildings and HVAC systems, ASHRAE guidance treats dew point and material moisture as design concerns. It recommends keeping humidity below a maximum 60°F dew-point temperature during unoccupied hours and identifies gypsum board moisture content above 15% WME as an early warning sign of mold risk, as summarized in the EPA's mold course material on moisture control.
The same review applies to an existing house and to basement house plans with drainage and moisture details. Cleaning has a role. Durable prevention comes from daily moisture control and plan-level choices that help the structure stay dry.
Finding and Fixing Moisture at the Source
Start with the water, not the discoloration. A small plumbing drip can wet cabinet bases and flooring for weeks, while a roof leak may travel along framing before appearing far from its entry point. Find the origin, stop it, remove wet materials where appropriate, and confirm that the area dries.
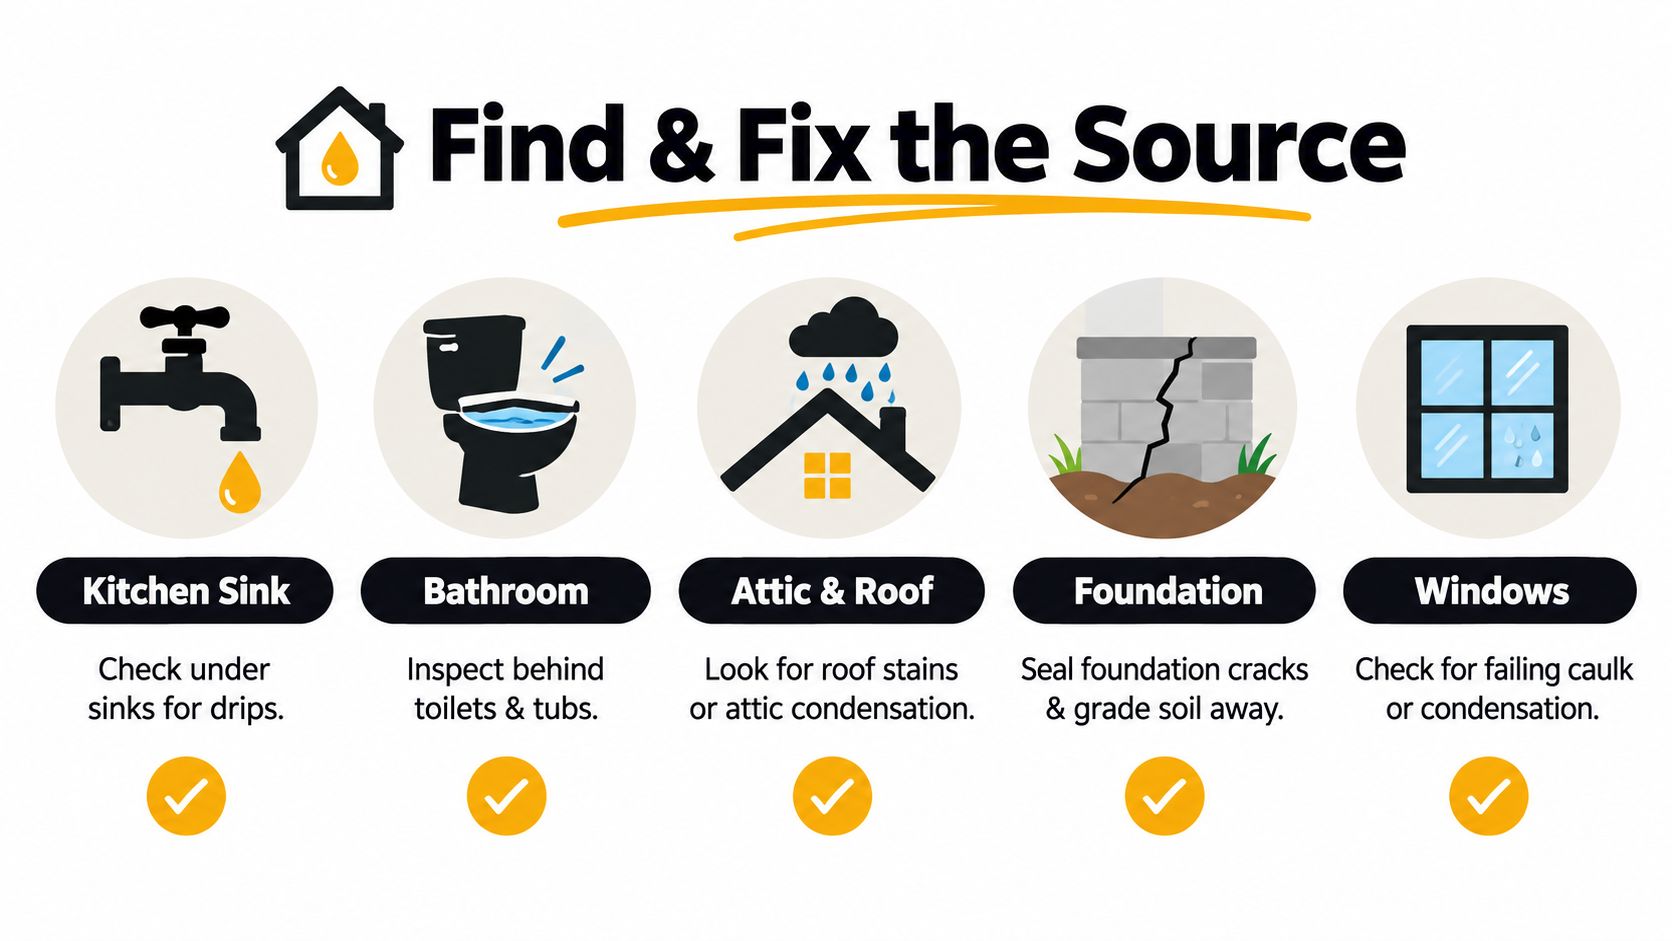
Inspect by room and by assembly
Kitchen and laundry: Open the cabinet beneath each sink and look for damp edges, swollen particleboard, or mineral marks around fittings. Check washing-machine hoses, supply valves, and the floor beneath the appliance. A laundry room plan should also protect the floor from routine drips and make shutoffs accessible, which is one reason laundry room floor plans in modern home design deserve more attention than appliance placement alone.
Bathrooms: Inspect behind toilets, below vanities, around tubs, and along shower caulk. Condensation on the ceiling or walls points toward a ventilation problem, but staining below a plumbing fixture requires leak investigation.
Attic and roof: Look for brown stains, damp insulation, rusty fasteners, wet roof decking, or condensation on the underside of the roof. Roof penetrations, flashing, and bathroom exhaust ducts deserve close attention. For a focused attic inspection, these attic moisture control tips offer useful guidance on the areas homeowners commonly miss.
Windows and exterior walls: Failing caulk, damaged flashing, and persistent condensation can wet trim and adjacent drywall. Cold corners behind furniture also deserve inspection because restricted air movement can keep surfaces damp.
Foundation and crawlspaces: Check for seepage, efflorescence, damp insulation, musty odors, and soil that directs rain toward the structure. Correct grading and drainage before applying an interior coating that only hides the symptom.
Drying determines the outcome
Stop the supply first. Shut off water, cover an opening, repair flashing, or correct drainage, then remove standing water and increase airflow. Porous materials that stay wet may need professional evaluation, especially when swelling, softness, staining, or a persistent odor indicates concealed damage.
Don't guess at dryness. Record readings from a moisture meter at the affected material and compare them with nearby unaffected areas over time. If moisture remains high inside a wall, ceiling, or floor assembly, call a qualified contractor or remediation professional instead of sealing the surface and hoping the problem disappears.
Daily Habits and Seasonal Maintenance That Keep Homes Dry
Many moisture problems begin without a broken pipe. Showers release steam, cooking adds water to indoor air, damp laundry evaporates, and furniture can block air from reaching cool exterior walls. A simple routine keeps these ordinary sources from becoming persistent conditions.
Small actions make drying easier
Run the bathroom exhaust fan during a shower and leave it operating afterward long enough to clear steam. Use the kitchen hood when boiling, simmering, or washing large amounts of dishes, and make sure exhaust air leaves the building rather than entering an attic or crawlspace.
Dry laundry outdoors when practical or use a properly vented dryer. Clean lint from the filter after each load and inspect the dryer vent path seasonally. A restricted vent adds heat and moisture to the home while also creating a maintenance concern.
Place a dehumidifier where dampness occurs, such as a basement or enclosed crawlspace, rather than assuming one device will correct every room. Leave breathing space between stored items and exterior walls, and avoid packing closets so tightly that air cannot circulate.
Put exterior checks on the calendar
Gutters and downspouts should direct roof water away from the foundation. Clear leaves and sediment, confirm that downspouts discharge safely, and look for soil erosion that sends water back toward the house. Inspect exterior caulk, weatherstripping, window trim, and penetrations before wet seasons arrive.
During seasonal checks, enter the attic and crawlspace with a flashlight. Look for damp insulation, roof-deck staining, condensation, blocked vents, or musty odors. A hygrometer in a problem area can reveal conditions that a brief visit misses.
Practical rule: If a room repeatedly smells musty, treat the odor as an inspection prompt, not as an invitation to add fragrance.
Wipe visible condensation from cold windows and walls, keep bathroom doors open after use when appropriate, and avoid storing wet towels in closed rooms. These habits won't repair a leak or replace sound construction, but they reduce the everyday moisture load that systems and assemblies must handle.
Ventilation and HVAC Strategies That Control Humidity
A thermostat can show a comfortable temperature while moisture continues building indoors. Air conditioning removes water only when the system runs long enough and matches the home's load. Oversized equipment cools rooms quickly, then shuts down before extracting enough moisture. Blocked returns, dirty filters, and leaky ducts reduce circulation and leave damp zones behind.
Aim for 30% to 50% relative humidity indoors, and treat readings above 60% as a warning that condensation may develop. Place digital hygrometers in bathrooms, basements, bedrooms, and other areas with a history of dampness. Record readings at different times and seasons. A single measurement rarely explains a recurring problem.
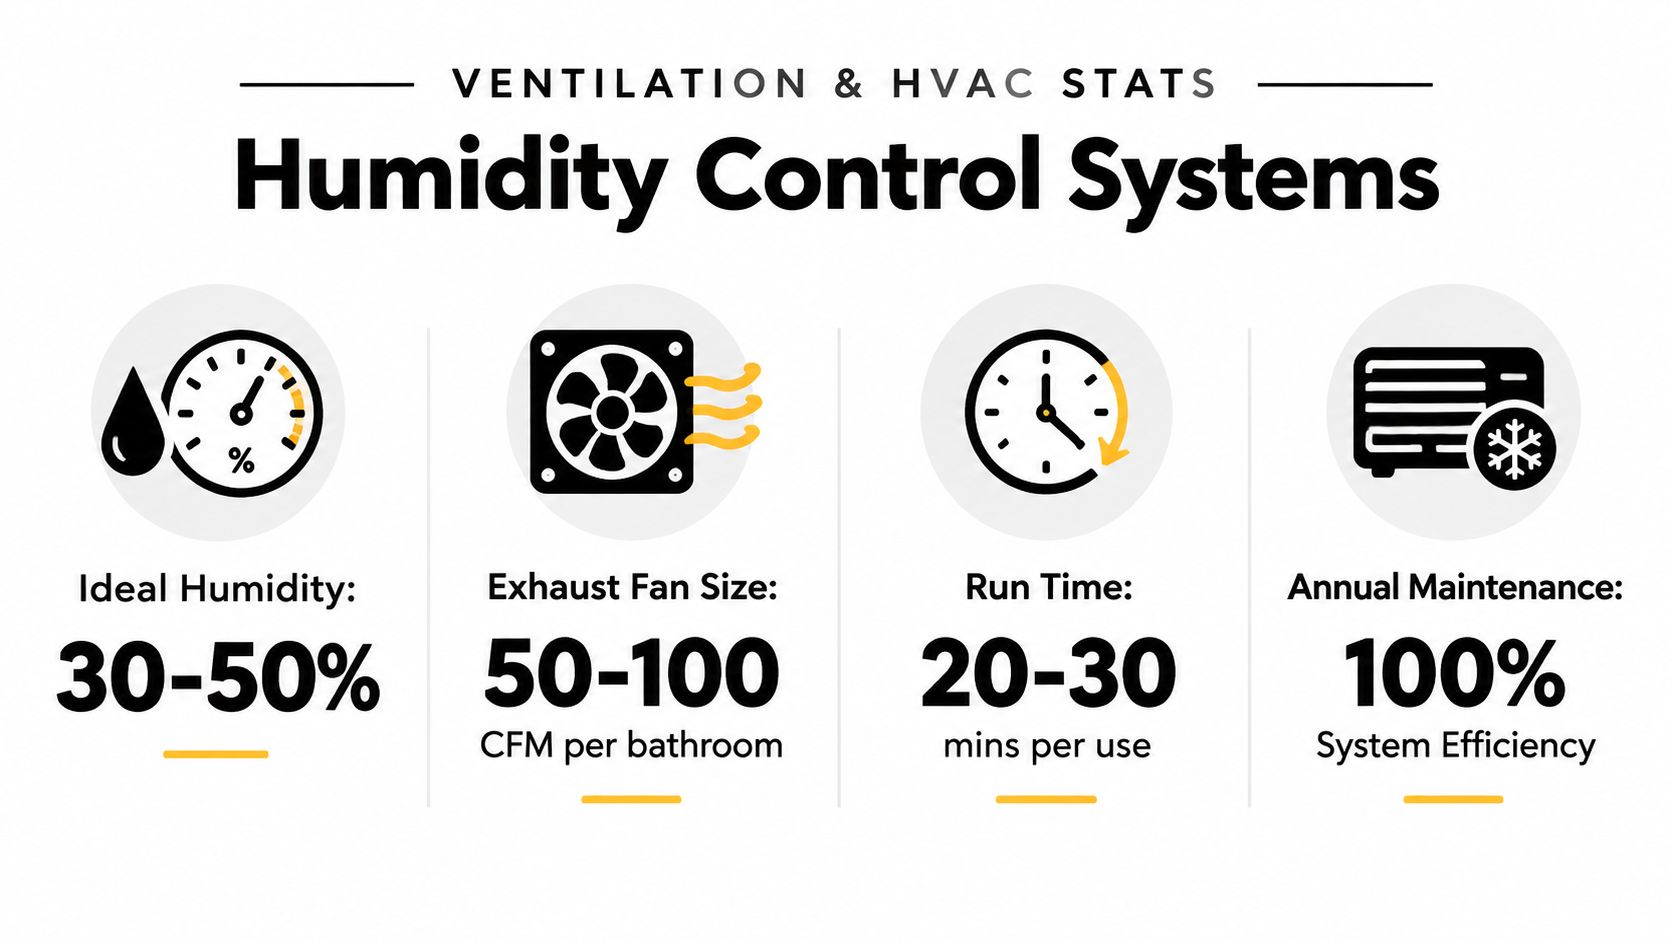
Match the system to the moisture load
Bathroom exhaust must discharge outdoors, with airflow suited to the room and duct layout. A fan that vents into an attic moves moisture into a concealed assembly. Keep grilles clean, ducts open, and provide replacement air so the fan can remove moisture.
Whole-home ventilation improves air exchange only when it is coordinated with heating, cooling, and climate. In humid regions, uncontrolled outdoor air can raise the indoor moisture load unless dehumidification is included. In dry climates, excessive exhaust can waste conditioned air and make the home uncomfortable. Well-coordinated energy-efficient house plans address foundation, roof, wall assembly, ventilation, and HVAC decisions together, before construction limits the available solutions.
ASHRAE guidance uses dew point to evaluate moisture performance. It recommends that new buildings and HVAC systems support drying by keeping humidity below a maximum 60°F dew point during unoccupied hours. Its moisture-control criteria also limit surface relative humidity to below 80% in a 30-day running average when surface temperatures fall between 41°F and 104°F, with short-term limits of 98% over 7 days and 100% over 24 hours, as described in the ASHRAE moisture-control standard addendum.
Verify rather than assume
Use a moisture meter on suspect gypsum board, trim, and subflooring. Moisture above 15% WME in gypsum board is an early mold-risk warning sign. If humidity stays high despite normal thermostat readings, have an HVAC professional check equipment sizing, coil condition, condensate drainage, filters, duct leakage, and return-air paths.
For practical guidance on ventilation, filtration, and indoor conditions, review this guide to home air quality from Comfort Experts. Good indoor air starts with source control, and moisture is one of the main sources to manage.
Smarter Materials and Assembly Choices in Your Home Plan
Mold prevention becomes easier when the building can drain, dry, and stay separated from bulk water. Materials don't compensate for poor flashing or a leaking roof, but assemblies can either provide drying paths or trap moisture where inspections are difficult.
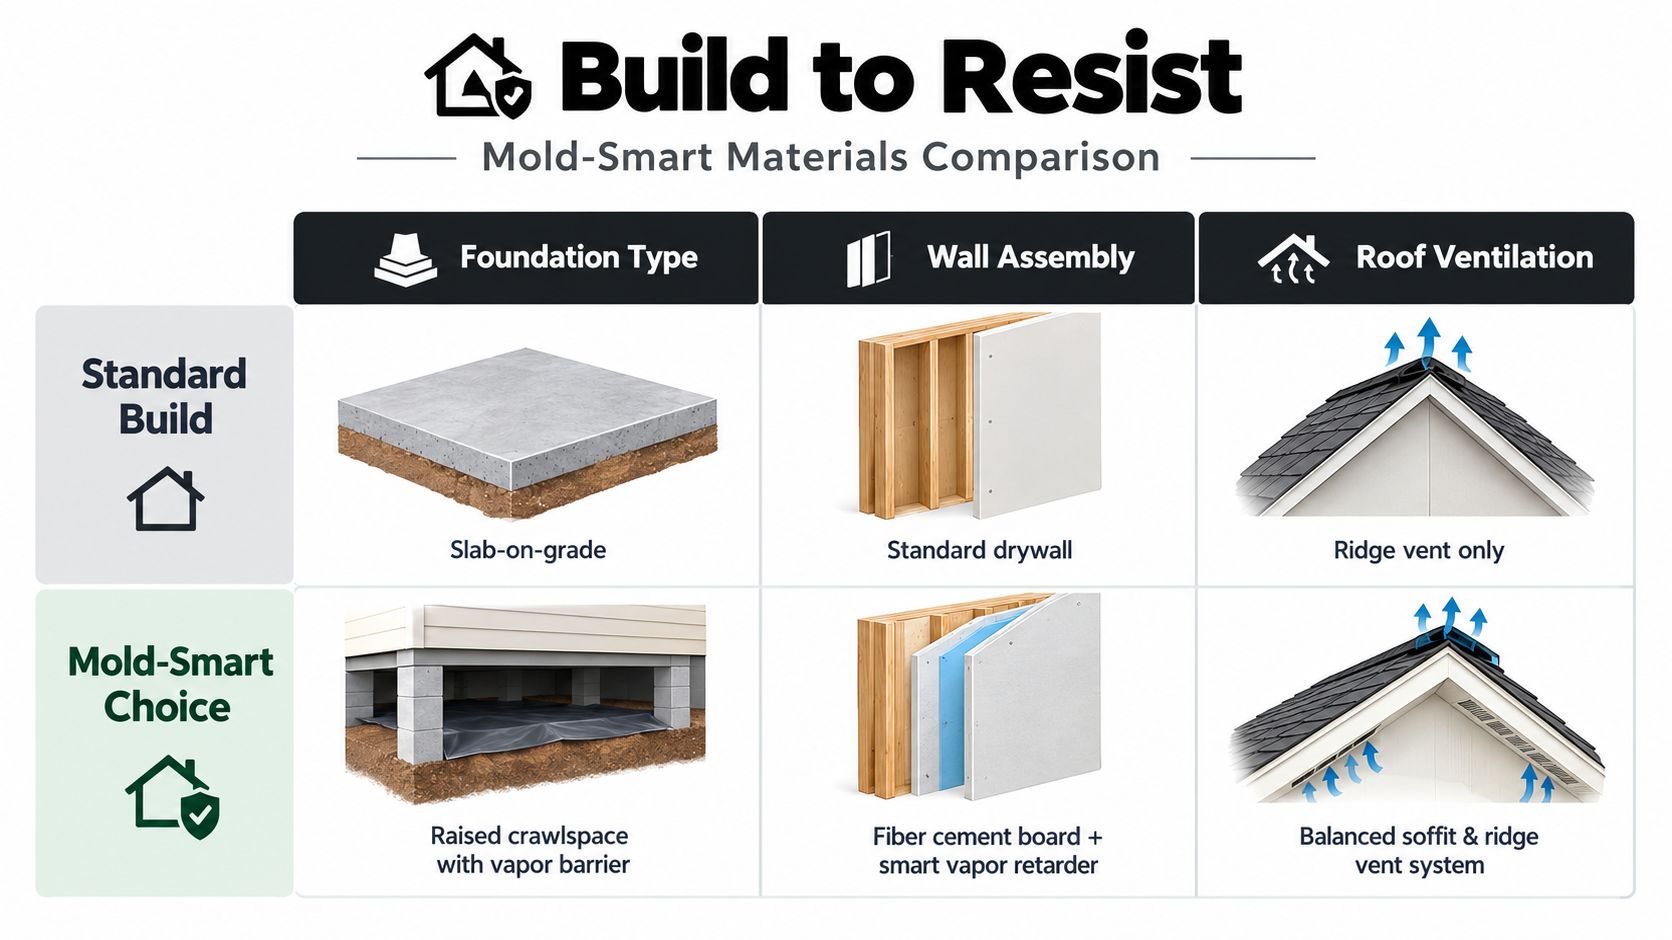
Compare the foundation approach
A slab-on-grade can perform well when the site is properly drained and the under-slab moisture control is detailed correctly. A crawlspace needs deliberate protection, including a continuous ground vapor barrier, sealed penetrations, drainage planning, and access for inspection. The better choice depends on soil, groundwater, climate, grading, and the finished-floor relationship to the site.
For basements, exterior drainage, waterproofing, foundation insulation, and reliable sump planning matter more than an interior paint marketed as a moisture solution. If the design places living areas below grade, ask how bulk water will be diverted and how concealed assemblies can be inspected.
Make walls and roofs capable of drying
A wall assembly should include a continuous drainage plane, carefully flashed openings, sealed penetrations, and insulation that limits cold surfaces. Vapor-control layers need climate-appropriate placement. A “tighter” wall isn't automatically safer if the design prevents drying toward both sides under the conditions the building will experience.
In wet rooms, choose finishes that tolerate repeated exposure, but don't mistake water-resistant board or nonporous panels for waterproof construction. Seams, transitions, penetrations, and shower waterproofing still require disciplined installation.
Roof ventilation needs balanced intake and exhaust. A ridge vent without a functioning soffit intake may not move air through the intended path. Coordinate insulation baffles, air sealing, bath-fan ducts, and roof penetrations so attic moisture doesn't collect against the roof deck.
Put measurable checks into the specification
ASHRAE's moisture criteria turn surface humidity into a design target, while the EPA notes that gypsum board above 15% WME is an early warning sign. Ask the design and construction team how they'll protect materials from rain, stage drying, and verify moisture before enclosing walls.
When adapting a plan, discuss the site and climate with the architectural team before construction documents are finalized. Decisions about foundation type, roof overhangs, ventilation, window placement, and mechanical-room access are much easier to resolve on paper than after finishes conceal the work.
Your Mold Prevention Checklist and Next Steps
A workable prevention system has three parts: inspect, control, and verify. Inspect the places where water enters or condenses. Control the source with repairs, exhaust, drainage, air movement, or equipment changes. Verify the result with recorded humidity and moisture readings.
Use this room-by-room checklist:
Bathrooms: Check ceiling corners, exhaust operation, caulk, grout, plumbing connections, and lingering condensation.
Kitchens and laundry rooms: Inspect beneath sinks, around appliances, supply hoses, drain connections, and dryer exhaust paths.
Attics: Look for roof stains, damp insulation, blocked ventilation, condensation, and exhaust ducts that terminate in the wrong location.
Basements and crawlspaces: Check drainage, foundation walls, floor edges, insulation, vapor barriers, and musty odors.
Windows and exterior walls: Look for failed caulk, wet trim, persistent condensation, cold corners, and furniture blocking airflow.
Keep a simple log with the room, date, humidity reading, moisture-meter location, weather conditions, and action taken. A recurring reading is more informative than a single measurement. If the same area stays damp, escalate the inspection instead of repainting.
For new construction or major renovation, revisit the plan when the site has unusual drainage, a damp crawlspace, a below-grade living area, or a climate that demands stronger humidity control. Ask about balanced roof ventilation, accessible mechanical equipment, appropriate vapor control, drainage planes, and assemblies that can dry.
Mold prevention isn't a cleaning trick. It's a repeatable building-maintenance practice supported by sound design, prompt repairs, and measured conditions.
RBA Home Plans provides architectural blueprints for buyers, builders, and developers, with layouts that can be reviewed and adapted for site, climate, foundation, ventilation, and moisture-control needs. Visit RBA Home Plans to explore construction-ready designs and find a plan you can discuss with your architectural and building team.


Comments