
Your 2025 New Home Build Checklist: 9 Critical Phases
- Aug 4, 2025
- 15 min read
Updated: Sep 22, 2025
Embarking on a new home build is one of the most exciting journeys you can take, but turning that dream into a tangible reality requires meticulous planning, diligent oversight, and a deep understanding of the construction process. Without a structured approach, critical details can be missed, leading to costly mistakes, timeline delays, and future headaches. This comprehensive new home build checklist is designed to empower you through every phase of construction, ensuring nothing falls through the cracks.
This guide will break down the nine most critical stages, providing actionable insights, expert tips, and real-world examples to ensure your project stays on track, on budget, and meets the highest quality standards. Before breaking ground, it's essential to factor in the often-overlooked expenses associated with ensuring your build complies with local standards. Gaining clarity on these can significantly streamline your budget planning and prevent costly delays, so be sure to include understanding UK building regulations costs in your initial planning.
From the moment the foundation is poured to the final walkthrough, consider this your essential roadmap. We'll guide you through navigating the complexities of home construction so you can build with confidence and peace of mind.
1. Foundation Inspection and Site Preparation
Everything in your new home rests on its foundation. This first major phase of your new home build checklist is arguably the most critical, as mistakes here can lead to catastrophic structural failures down the road. This stage involves more than just pouring concrete; it encompasses precise site preparation, excavation, footing installation, rebar placement, and utility rough-ins. The goal is to create a stable, level, and durable base that will support your home for decades.
Why It's Crucial
A properly executed foundation prevents issues like uneven settling, wall cracks, and moisture intrusion. Major builders understand this. For example, Toll Brothers often uses laser-guided equipment to ensure exact dimensions, while many custom builders opt for specially engineered foundation systems to handle challenging soil or terrain. Neglecting this step can lead to costly and disruptive repairs that are far more extensive than getting it right the first time.
Key Steps for a Solid Foundation
This infographic illustrates the fundamental workflow for a successful foundation pour, a key milestone in any build.

As shown, each step builds directly upon the last, making sequence and quality control essential for the structural integrity of your home.
Actionable Tips
Hire an Independent Inspector: Even if your builder has their own inspections, a third-party inspector works for you. They can verify rebar placement, footing depth, and concrete mixture before the pour, providing an unbiased assessment.
Document Everything: Take photos and videos at every stage, especially before the concrete is poured. This creates a permanent record of the rebar grid, plumbing rough-ins, and vapor barriers.
Verify Drainage: Ensure the site is graded correctly so that water slopes away from the foundation on all sides. This simple step is vital for preventing basement leaks and water damage.
For a deeper dive into what inspectors look for, you can learn more about building inspection checklists.
2. Framing and Structural Integrity
Once the foundation is set, the framing phase brings your home’s blueprint to life in three dimensions. This is where the "skeleton" of your house is built, creating the walls, floors, and roof structure that define your living spaces. Using lumber or steel, the framing crew establishes room layouts, window and door openings, and the home's overall shape. This step in the new home build checklist is vital for ensuring the structure is strong, safe, and built to last.
Why It's Crucial
Proper framing is non-negotiable for structural integrity. It ensures the house can withstand environmental loads like wind and snow and support the weight of all finishing materials. Many production builders, like KB Home, utilize pre-engineered framing packages to guarantee consistency and adherence to code. In contrast, luxury builders might employ timber framing specialists for complex architectural designs. Flaws in framing can lead to sagging floors, crooked walls, and doors that won't close properly, making it a critical inspection point.
Key Steps for a Plumb Structure
The quality of framing directly impacts every trade that follows, from drywall and cabinetry to window installation. A precise and sturdy frame is the backbone of a high-quality home. Ensuring every wall is plumb (perfectly vertical) and every corner is square is a foundational principle championed by experts like Norm Abram of This Old House and codified in the International Residential Code (IRC). This precision prevents a domino effect of issues later in the build.
Actionable Tips
Walk Through with a Tape Measure: Before mechanical systems are installed, walk the framed house with your floor plans and a tape measure. Verify that room dimensions and window and door openings match the approved plans.
Check for Plumb and Square: Bring a level to check that walls are plumb and a framing square for corners. While minor imperfections are normal, significant deviations should be addressed immediately.
Inspect Structural Connections: Look at how joists, studs, and beams are connected. Ensure proper hangers, fasteners, and support blocking are used according to the architectural plans and local building codes.
Verify Stair Construction: Check that staircases have the correct riser height and tread depth. Incorrectly built stairs are a major safety hazard and difficult to fix later.
3. Electrical System Rough-In
Once the home is framed and sheathed, the next critical phase in your new home build checklist involves running the wires and placing the boxes that will power your life. The electrical rough-in phase is when electricians install all the wiring, outlet boxes, switch locations, and circuit breaker panels before the drywall is hung. This is your home's nervous system, and getting it right ensures safety, convenience, and future readiness for decades to come.
Why It's Crucial
A well-planned electrical system accommodates today’s technology and anticipates tomorrow’s needs. Modern homes demand far more electrical capacity for everything from high-draw appliances to smart home devices. For example, many new constructions now integrate pre-wiring for systems like Tesla Solar or Lutron smart lighting. A poorly planned rough-in can lead to overloaded circuits, inconvenient outlet placement, and costly retrofitting later.
Key Steps for a Powerful Home
Proper electrical planning is not just about meeting minimum code requirements but about designing a modern living system. A thoughtful layout ensures you have power exactly where you need it, preventing the future use of extension cords and power strips. This is the only chance to run wires easily and affordably before the walls are closed up.
Actionable Tips
Plan for More Than You Need: Install more outlets than the minimum code dictates in every room, especially in home offices and entertainment areas. Consider adding outlets inside closets or pantries for charging vacuums and other devices.
Install Dedicated Circuits: High-power equipment like computers, home theater systems, or a second refrigerator needs a dedicated circuit to prevent tripping breakers. This is especially important for a home office.
Consider Whole-House Surge Protection: A surge protector installed at the main electrical panel can safeguard all your sensitive electronics from power surges, a common issue in storm-prone areas.
Pre-wire for the Future: Even if you aren't installing smart home features or a security system immediately, running low-voltage wiring for them now is a smart, cost-effective investment.
4. Plumbing Rough-In and Water Systems
With the framing complete, the plumbing rough-in is the next critical phase in your new home build checklist. This stage involves installing all the behind-the-scenes water supply and drainage pipes before the drywall goes up. It includes running hot and cold water, drain, vent stacks, and gas lines to their designated locations. Getting this right is fundamental to the long-term, leak-free operation of your home's kitchen, bathroom, and laundry room.
Why It's Crucial
A proper plumbing rough-in prevents future leaks, poor drainage, bad odors, and clogs. Industry leaders like Viega have revolutionized this stage with press-fit systems that create secure, reliable connections without soldering. During this phase, it's also the ideal time to incorporate modern water management solutions. For instance, installing a whole-house filtration system is much easier now than later, as is roughing in plumbing for a future water softener or a smart leak detector like Flo by Moen.
Key Steps for a Reliable Plumbing System
Executing the rough-in correctly requires meticulous planning and adherence to code. All drain lines must have the correct slope to ensure proper flow, and every fixture needs a vent to prevent sewer gases from entering your home. Every connection must be solid, as it will soon be sealed behind walls, making future access difficult and expensive. Paying close attention to specifics like shower valve rough-in dimensions ensures that finish fixtures like faucets and shower heads will install correctly and function as designed.
Actionable Tips
Pressure Test Everything: Before installing insulation or drywall, insist that your plumber pressure test the entire system. This involves filling the supply lines with air or water at high pressure to confirm that there are no leaks.
Verify Drain Slopes: Use a level to personally check that all drainpipes have a gentle, consistent downward slope toward the main sewer line. A standard slope is a quarter-inch of fall per foot of pipe.
Plan for Future Needs: Even if you aren't installing a water softener immediately, having the plumbing roughed in for one is a smart, low-cost upgrade. The same applies to adding a utility sink in the garage or an outdoor kitchen.
5. HVAC System Installation and Efficiency
Your HVAC (Heating, Ventilation, and Air Conditioning) system is the heart of your home's comfort and a major factor in your long-term utility costs. This phase of the new home build checklist goes beyond simply placing an air conditioner and furnace. It involves meticulous planning for ductwork runs, correct equipment sizing, and integrating smart technology for optimal performance and air quality. A properly installed system ensures consistent temperatures, healthy air, and minimal energy waste.
Why It's Crucial
A poorly designed or installed HVAC system can lead to uncomfortable hot and cold spots, excessive noise, high energy bills, and poor indoor air quality. Leading manufacturers like Carrier and Trane have developed advanced systems, such as variable-speed units or geothermal solutions, that are only as good as their installation. An undersized unit will struggle to keep up, while an oversized one will cycle improperly, failing to dehumidify the air and wearing out prematurely.
Key Steps for an Efficient System
The installation process is a critical part of the overall home construction timeline, often happening in stages from rough-in to final trim.
Expert Insight: The most common failure point is not the equipment itself, but improper installation. Leaky ductwork alone can reduce system efficiency by 20-30%, a loss that directly translates to higher monthly bills and reduced comfort.
Ensuring the system is installed according to precise engineering calculations is non-negotiable for modern, energy-efficient homes.
Actionable Tips
Demand a Manual J Calculation: Your HVAC contractor must provide a "Manual J" load calculation. This industry-standard report determines your specific home's heating and cooling needs, ensuring equipment is sized perfectly.
Inspect Ductwork Before Drywall: Before the walls are closed up, walk through and visually inspect all ductwork. Look for sealed joints (using mastic or foil tape, not just duct tape), smooth runs without sharp bends, and secured connections.
Verify Return Air Vents: Every room should have a clear path for air to return to the main unit. This is often accomplished with dedicated return air vents or jumper ducts, preventing pressure imbalances that make rooms uncomfortable.
Check Outdoor Unit Placement: Ensure the outdoor condenser unit has adequate clearance on all sides as specified by the manufacturer. This is crucial for proper airflow and efficient operation.
You can explore a detailed house construction timeline to learn more about how this phase fits into the larger picture.
6. Insulation and Energy Efficiency
Once framing is complete and rough-ins are done, the next critical phase on your new home build checklist is installing the thermal envelope. This involves much more than just putting fiberglass batts in the walls; it’s a comprehensive system of insulation and air sealing that dictates your home's long-term comfort and utility costs. Proper installation in walls, attics, and basements is essential for creating a high-performance home that is both comfortable and affordable to operate.
Why It's Crucial
Effective insulation and air sealing work together to minimize heat transfer, keeping your home warm in the winter and cool in the summer. This directly translates to lower energy bills and a reduced carbon footprint. For instance, builders focused on high-performance homes often use spray foam insulation to create a near-perfect air seal, while others may use continuous exterior insulation to eliminate thermal bridging. Neglecting this stage leads to drafts, inconsistent temperatures, and unnecessarily high utility bills for the life of the home.
Key Steps for a High-Performance Thermal Envelope
A complete thermal envelope goes beyond just walls. It requires a holistic approach that addresses all potential areas of heat loss and air leakage, creating a truly sealed and efficient living space.
As the diagram illustrates, every part of the home's shell must be addressed to achieve optimal performance and prevent energy waste.
Actionable Tips
Verify R-Values: Confirm that the R-value (a measure of thermal resistance) of the insulation being installed meets or exceeds the code requirements for your specific climate zone. Don't be afraid to ask for the product specifications.
Inspect for Gaps: Before drywall goes up, carefully inspect the insulation. Look for any gaps, voids, or compressed areas, especially around windows, electrical boxes, and plumbing penetrations. These small gaps can significantly reduce overall effectiveness.
Check Attic Ventilation: Ensure that attic insulation does not block soffit vents. Proper airflow from soffits to ridge vents is crucial for preventing moisture buildup and ice dams in the winter.
Confirm Vapor Barrier Installation: In colder climates, a properly installed vapor barrier on the warm-in-winter side of the insulation is vital for moisture control. Verify it is continuous and free of tears or unsealed seams. To ensure your new home is truly future-proof and cost-effective, implement the best energy efficient home design strategies from the initial planning stages.
7. Roofing and Weather Protection
The roof is your home's first line of defense against the elements, making its proper installation a non-negotiable part of any new home build checklist. This stage goes beyond simply laying shingles; it involves creating a complete system that includes underlayment, flashing, ventilation, and gutters. The goal is to build a watertight, durable, and efficient barrier that protects the entire structure from rain, snow, wind, and sun.
Why It's Crucial
A compromised roof can lead to some of the most destructive and expensive problems a homeowner can face, including widespread water damage, mold growth, and structural rot. Leading manufacturers like GAF have popularized advanced roofing systems, such as their Timberline HD shingles, which are engineered for superior durability and weather resistance. In areas prone to severe weather, builders often recommend metal roofing for its exceptional longevity and impact resistance, demonstrating how material choice is tailored to the environment.
Key Steps for a Watertight Roof
Proper installation requires a systematic approach to ensure every layer works together. This includes installing a high-quality synthetic underlayment over the roof deck, followed by the primary roofing material. Flashing, the metal pieces installed around chimneys, vents, and skylights, is then meticulously placed to seal these vulnerable points. Finally, the system is completed with soffit and ridge vents for airflow and gutters for water management.
Actionable Tips
Inspect the Underlayment: Before the primary roofing material is installed, walk the roof with your builder (if safe to do so) to confirm the underlayment is laid flat without tears and that all seams are correctly overlapped.
Verify Flashing Installation: Pay close attention to how flashing is installed around chimneys, vents, and valleys. It should be layered correctly to direct water over the shingles, not under them.
Check for Proper Ventilation: Ensure your builder has installed both soffit vents (for intake) and ridge vents (for exhaust). Proper attic ventilation is critical for preventing moisture buildup and reducing cooling costs.
Test Gutter Performance: After the first significant rainfall, walk around your home to check that gutters are effectively channeling water to the downspouts and that there are no overflows or leaks.
8. Windows and Doors Installation
The installation of windows and doors is a pivotal moment in your new home build checklist, transitioning the structure from a weather-exposed frame to a secure, enclosed space. This phase determines your home's energy efficiency, security, natural light, and overall comfort. Proper installation involves precise fitting, meticulous weatherproofing, and correct hardware setup to ensure smooth, long-term operation.
Why It's Crucial
Poorly installed windows and doors can lead to significant problems like air leaks, water intrusion, and high energy bills. Top-tier window manufacturers like Andersen and Pella have developed specific installation protocols to maximize the performance of their products, such as the Andersen 400 Series, which is renowned for its energy efficiency. Ensuring these units are installed correctly is as important as the quality of the product itself, safeguarding your home against the elements and enhancing its security with features like smart locks from Schlage or Yale.
Actionable Tips
Verify Operation: Before the crew leaves, open, close, and lock every single window and door. They should operate smoothly without sticking or requiring excessive force.
Check Seals and Caulking: Inspect the perimeter of every exterior window and door frame. Look for a continuous, neat bead of caulk and intact weatherstripping to prevent drafts and water leaks.
Test All Hardware: Make sure all door handles, locks, and deadbolts function correctly. If you've opted for smart locks, ensure they are properly configured and paired.
Confirm Screens are Included: Screens are often forgotten. Verify that all window and door screens are on-site, fit properly, and are free of damage.
Match to Plans: Double-check the installed units against your architectural plans or "window and door schedule" to confirm the correct styles, sizes, and features were installed in the right locations.
9. Interior Finishes Quality Control
The interior finishes phase is where your new house truly starts to feel like a home. This critical part of the new home build checklist includes everything you see and touch daily: flooring, paint, trim work, cabinetry, countertops, and fixtures. Quality control here ensures all selections match your specifications, are installed correctly, and function flawlessly. This is the stage that defines the final aesthetic and everyday usability of your living spaces.
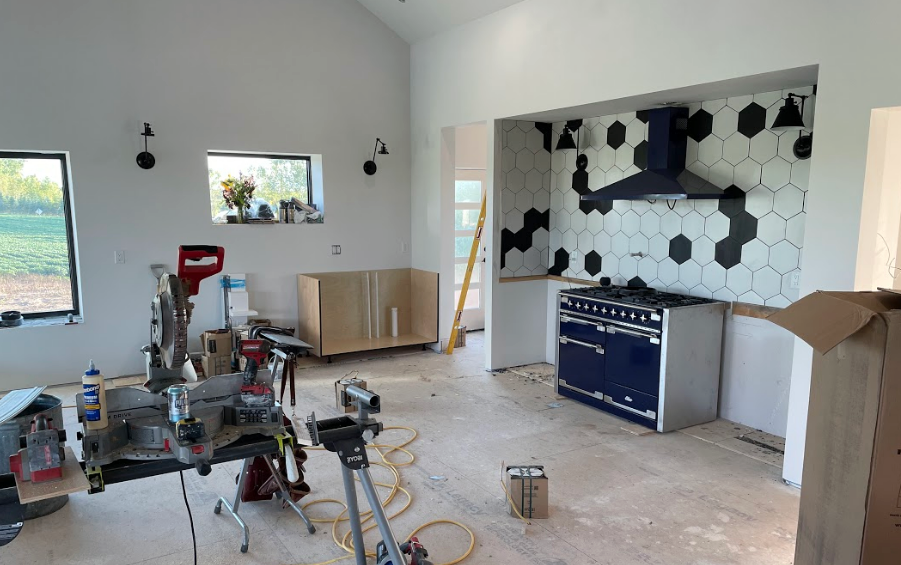
Why It's Crucial
This stage transforms the shell of a house into a finished product. Flaws in the finishes, such as a poorly installed hardwood floor from a brand like Bruce or a misaligned cabinet door, can be a constant source of frustration. High-end manufacturers like Kohler and Caesarstone rely on proper installation to deliver their promised performance and appearance. Careful inspection prevents the need for costly and inconvenient rework after you’ve moved in.
Key Steps for Finish Quality
Your direct involvement during this phase is vital for ensuring the final product meets your expectations. The goal is to identify and document every minor imperfection, creating what is known as a "punch list" for the builder to correct before the final walkthrough. This process ensures the details are just right, from paint touch-ups to fixture adjustments.
Actionable Tips
Create a Detailed Punch List: Walk through every room with a roll of blue painter's tape and a notepad. Mark any scratches, paint drips, or misaligned trim. Test every switch, outlet, and faucet to ensure they operate correctly.
Inspect Under Different Lighting: View surfaces in both natural daylight and with artificial lights on. Shadows and different light angles can reveal imperfections in paint, drywall, and flooring that might otherwise go unnoticed.
Verify All Selections: Bring your design selection sheet and confirm that the correct countertops, tile, fixtures, and paint colors were installed. Check that cabinet doors and drawers are perfectly aligned and feature the specified hardware.
For more guidance on what to look for, you can get additional details on construction quality control.
New Home Build Checklist Comparison
Stage | Implementation Complexity | Resource Requirements | Expected Outcomes | Ideal Use Cases | Key Advantages |
|---|---|---|---|---|---|
Foundation Inspection and Site Preparation | High – requires precision excavation, grading, rebar, concrete | Heavy equipment, skilled inspectors, quality materials | Stable and safe foundation, proper drainage | New builds, complex terrain sites | Prevents structural issues; ensures stability |
Framing and Structural Integrity | Moderate to high – lumber/steel framing; code compliance | Skilled carpenters, quality lumber/steel | Accurate room layouts, structural support | All residential construction | Visible issues can be fixed early; defines layouts |
Electrical System Rough-In | High – complex wiring, code critical | Licensed electricians, specialized tools | Safe electrical system, modern capacity | Modern homes, smart/home automation | Safety features; future-proofing capabilities |
Plumbing Rough-In and Water Systems | Moderate – pipe installation and testing required | Plumbers, quality piping materials | Reliable water supply and drainage | All residential projects | Prevents leaks; enables maintenance access |
HVAC System Installation and Efficiency | Moderate to high – equipment sizing and ductwork | HVAC technicians, equipment, design input | Comfortable, energy-efficient climate | Climate-controlled homes | Improved comfort; energy savings |
Insulation and Energy Efficiency | Moderate – requires proper material and air sealing | Insulation specialists, quality materials | Lower energy bills, better comfort | Energy-efficient, high-performance homes | Reduces energy costs; moisture control |
Roofing and Weather Protection | Moderate – material installation, ventilation | Roofers, quality roofing materials | Weatherproof home, long-term durability | All homes needing weather protection | Prevents leaks; protects home structure |
Windows and Doors Installation | Moderate – precise fitting, weatherproofing | Skilled installers, quality windows/doors | Energy savings, security, natural light | New builds, retrofits | Enhances comfort; security features |
Interior Finishes Quality Control | Moderate – detailed finishing work | Multiple trades, finishing materials | Polished, durable interior appearance | Final construction phase | Defines final aesthetics; ensures quality |
From Concept to Reality: Your Home is Complete
Building a new home is one of life's most significant undertakings, a journey that transforms raw materials into a personal sanctuary. The comprehensive new home build checklist we've navigated through isn't just a series of tasks to be completed; it's a strategic framework for ensuring quality, safety, and long-term satisfaction. By actively engaging with each phase, from the critical foundation and framing inspections to the nuanced details of interior finishes, you shift from being a passive observer to an empowered stakeholder in your own project.
This meticulous approach demystifies the construction process, turning what could be an overwhelming experience into a series of manageable, verifiable milestones. Each checkmark represents a safeguard for your investment and a step closer to the home you've envisioned.
Key Takeaways for a Successful Build
The most crucial takeaway is that your involvement is paramount. While you hire professionals for their expertise, your informed oversight ensures that the final product aligns perfectly with your expectations. Let’s recap the core principles:
Proactive Verification: Don't wait for problems to arise. Use this checklist to anticipate key inspection points for the foundation, framing, and crucial systems like electrical, plumbing, and HVAC. Early detection prevents costly and time-consuming fixes later.
Documentation is Your Ally: Keep meticulous records of everything: contracts, change orders, inspection reports, photos, and all communication with your builder. This organized documentation is invaluable for resolving disputes and for future reference.
The Punch List is Your Final Word: The final walkthrough, or punch list creation, is your last opportunity to ensure every detail meets the agreed-upon standards. Be thorough and methodical. Do not sign off on completion until you are completely satisfied with the rectified items.
Expert Insight: A successful home build is a marathon, not a sprint. Patience, persistent communication, and a commitment to verifying quality at every stage are the true cornerstones of a home built to last.
Your Next Steps on the Homebuilding Journey
As you stand on the threshold of your completed home, the real journey begins. Your diligence throughout the construction process now pays dividends in the form of a safe, efficient, and beautifully finished space. You've navigated the complexities of system installations and quality control, ensuring your home is more than just aesthetically pleasing; it's functionally sound. This mastery of the new home build checklist empowers you not just as a homeowner, but as a knowledgeable steward of your property.
The confidence to build a home of this caliber starts long before the first shovel breaks ground. It begins with a well-conceived, professional plan that serves as the unwavering guide for your entire team. You've built not just a structure, but a legacy.
A flawless home build begins with a flawless plan. At RBA Home Plans, we provide the award-winning architectural blueprints that serve as the foundation for dream homes across the country. Start your journey with a design that guarantees excellence from the ground up by exploring our extensive collection at RBA Home Plans today.


I like how this checklist breaks the build into clear phases, because it shows that good results come from smart decisions made early, not rushed fixes later. For me, the HVAC stage is one of the most important parts of a new home, since comfort, air quality, and energy efficiency affect daily life long after construction ends. That is why Sensibo Airbend fits naturally into this conversation. I would rather plan for better AC control, smart scheduling, and cleaner indoor air during the build than try to upgrade everything later. Small choices in construction can shape how well a home performs for years.